Hey mama mates! 👋
In search of an excellent candy and easy craft to maintain the kiddos entertained this weekend (or, let’s be actual—distracted when you drink your espresso whereas it’s nonetheless sizzling)? Look no additional! This Paper Cup Bunny Craft is as lovely as it’s straightforward. And the perfect half? You most likely have already got many of the provides mendacity round!
Let’s hop proper in! 🐇💕
🧺 What You’ll Want:
A bit gathering journey round your own home or craft drawer and also you’re golden. Right here’s what to seize:
- 🎨 Coloured craft papers (suppose tender pastels—bunny vibes!)
- 🥤 A plain paper cup (white or pastel works greatest!)
- 🧻 Embossed paper (optionally available however provides a bougie contact)
- ✏️ Pencil
- ✂️ Scissors
- 🧴 Craft glue
- ✍️ Sharpies or markers (for these cute little bunny faces)
Professional tip: When you’ve got googly eyes or cotton balls—add them! The extra aptitude, the merrier.
🐇 Let’s Get Artful!
Step 1:
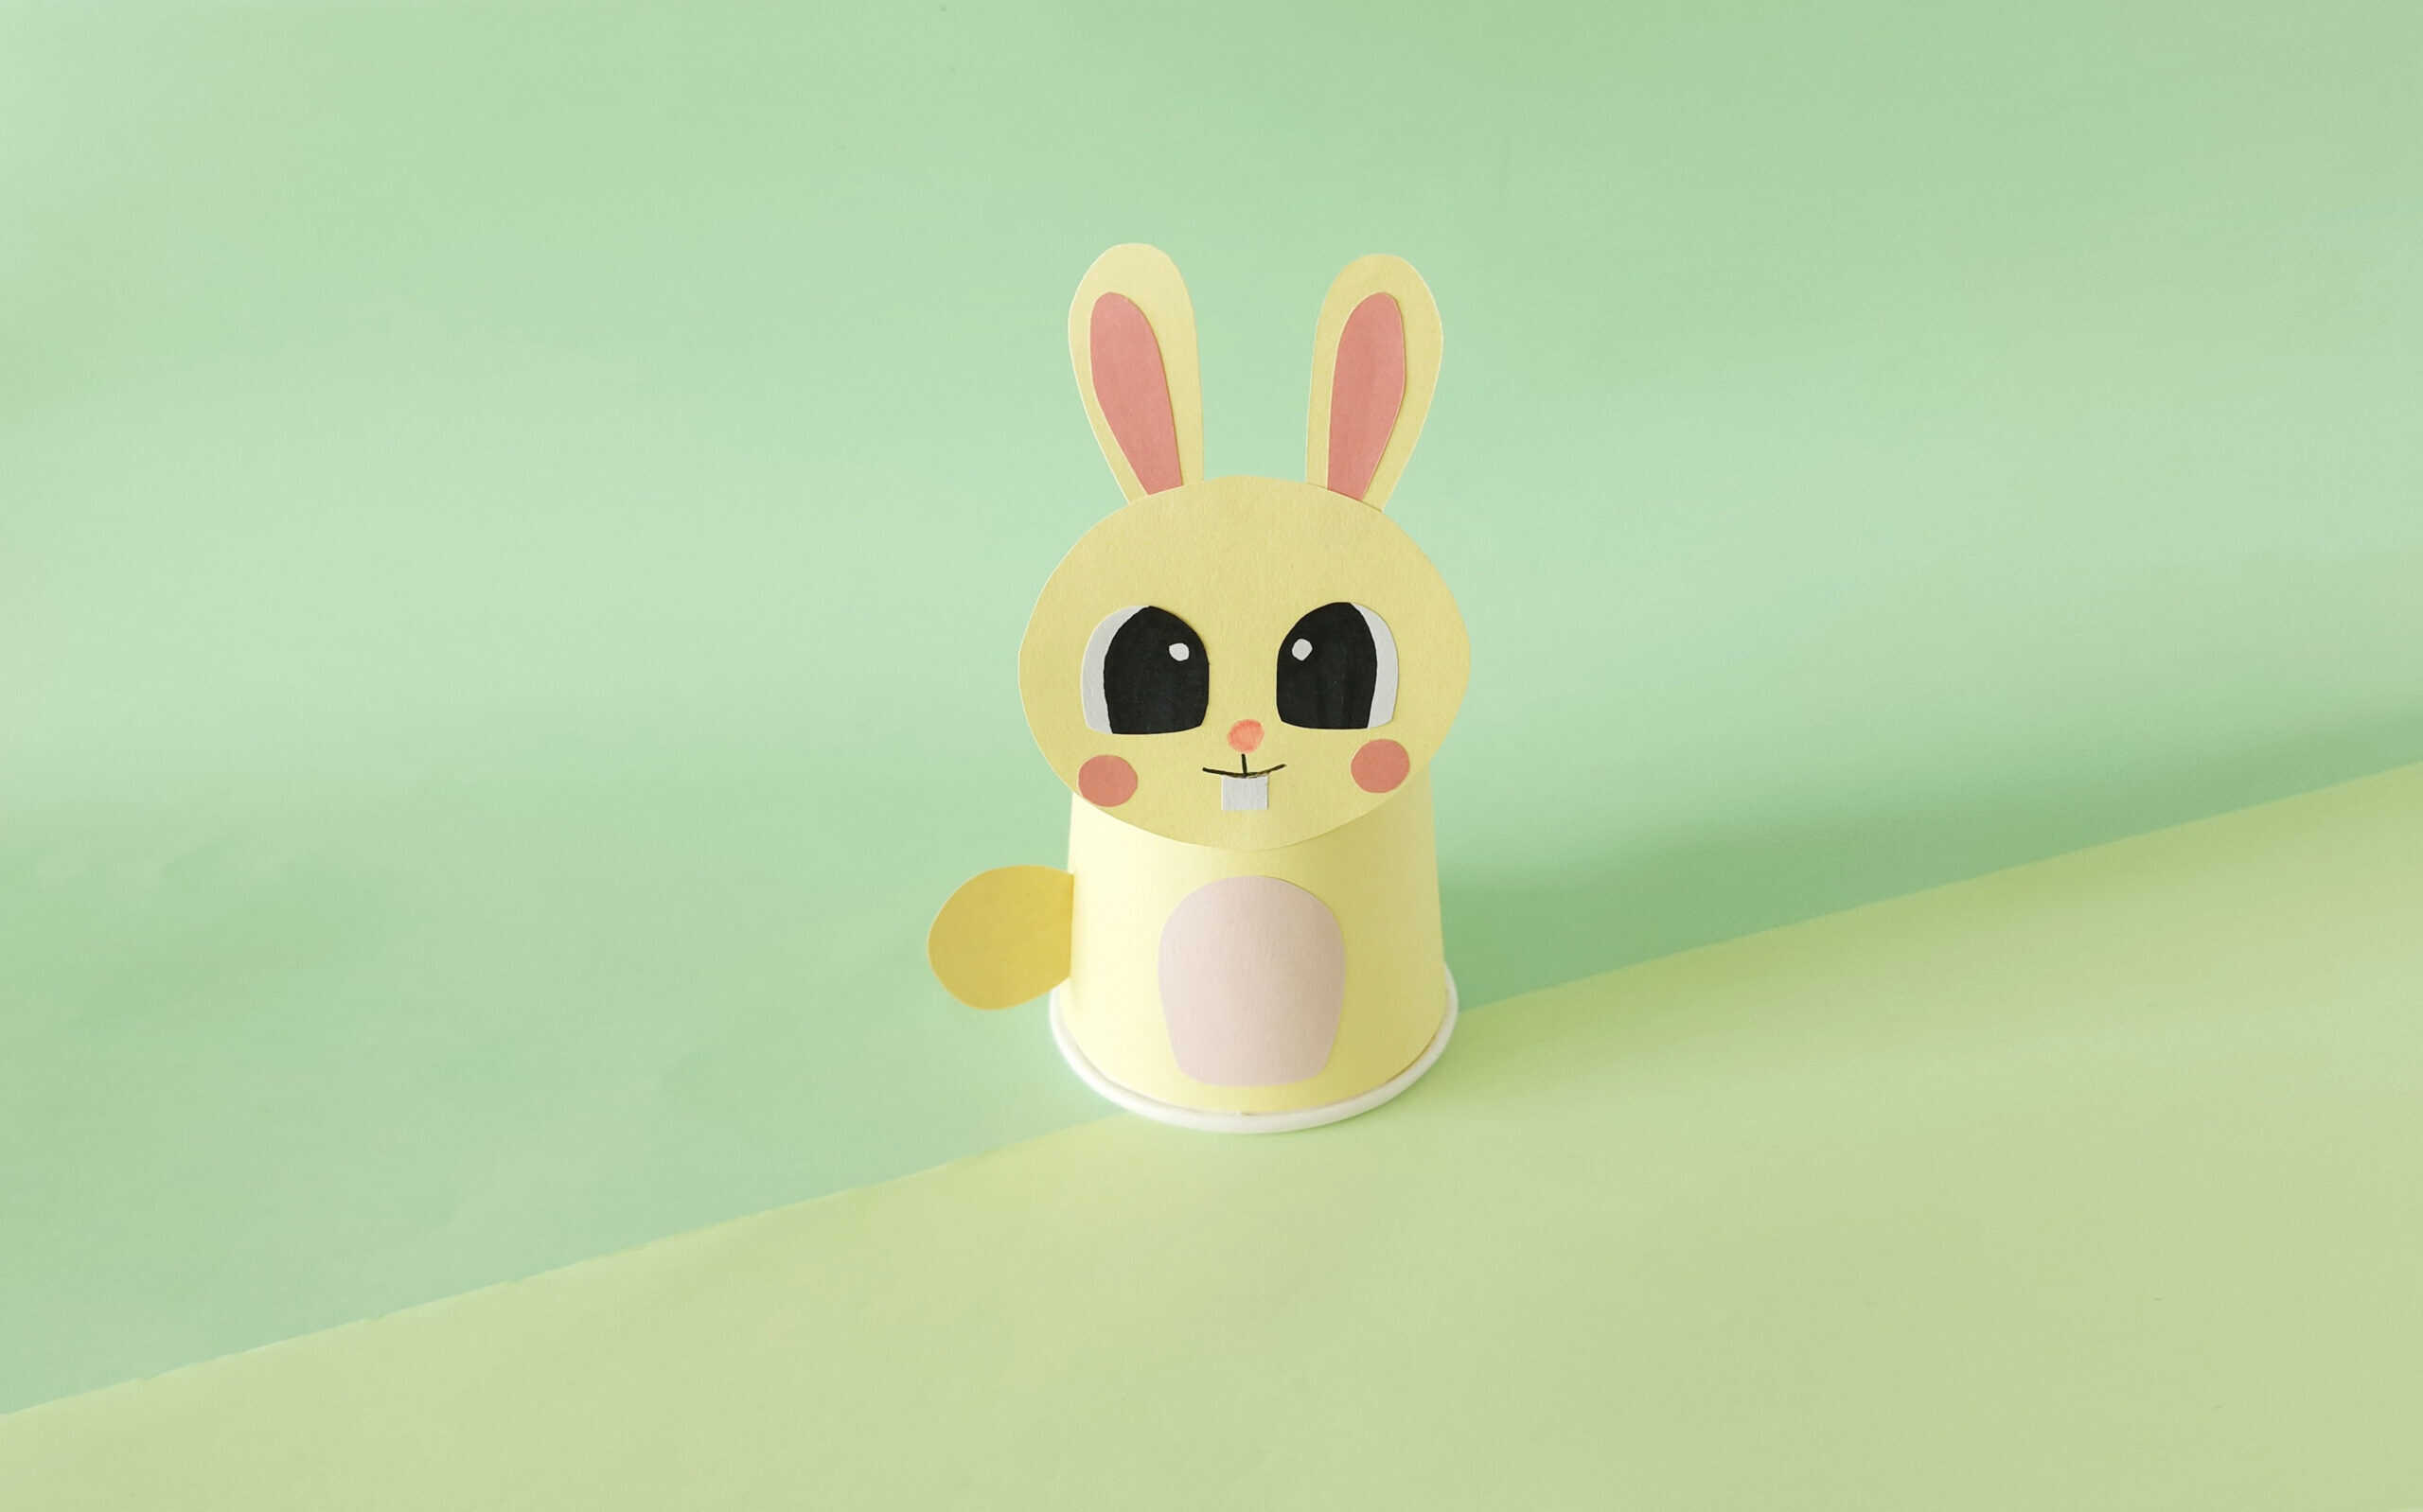
Begin by printing and chopping out the bunny template (you will discover it above – simply signal as much as the e-mail to get the template). The template features a head, internal ears, outer ears, eyes, blush, tail, stomach and cup cowl patterns.
Hint every bit onto coloured craft paper, and use embossed paper for the hair or the cup cowl should you’re feeling fancy!

Step 2:
Glue these little internal ear items onto the larger outer ears. Prompt cuteness.

Step 3:
Connect the completed ears to the highest of the bunny head.

Step 4:
Now add the eyes! In case you’re utilizing paper ones, simply glue them on. In case you’re utilizing googly eyes, prepare for some giggles.

Step 5:
Stick the pink “blush” circles below every eye. Belief me, it makes the bunny additional candy.

Step 6:
Use your sharpie to attract on the nostril and a cute smile. Don’t overlook so as to add the bunny enamel cutout—as a result of, iconic. 🐰

Step 7:
Wrap your paper cup with the cup cowl. A glue stick works wonders right here.

Step 8:
Glue the stomach piece onto the entrance of the cup.

Step 9:
Lastly, glue the top on prime of the cup—proper above the stomach. Give it a couple of minutes to dry and… voilà!

💡 Mother Suggestions:
- Make a household of bunnies in several colours!
- Fill the cups with jellybeans, cotton balls, or mini treats for a cute Easter or spring desk ornament.
- Let the children identify their bunnies. It’s hilarious. Ours have been named “Sir Hop-a-Lot” and “Princess Fuzzbutt.”
🎉 Last Ideas
This craft is a whole win for a wet day, a party, or only a quiet afternoon with gluey fingers and giggles. Plus, it’s screen-free enjoyable (hallelujah, proper?!).
Completely satisfied crafting, mama! Tag me should you make this—I’d LOVE to see your bunny crew. 🐰💕


Trending Merchandise